penn 525 mag T rebuild - 2/14/2010
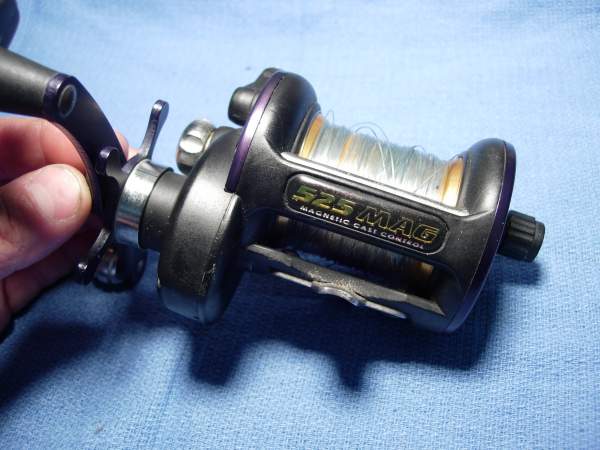
penn makes a nice series of graphite reels. they're light, they've got plenty of drag range, and they're very easy to service. here's a link to the schematic.
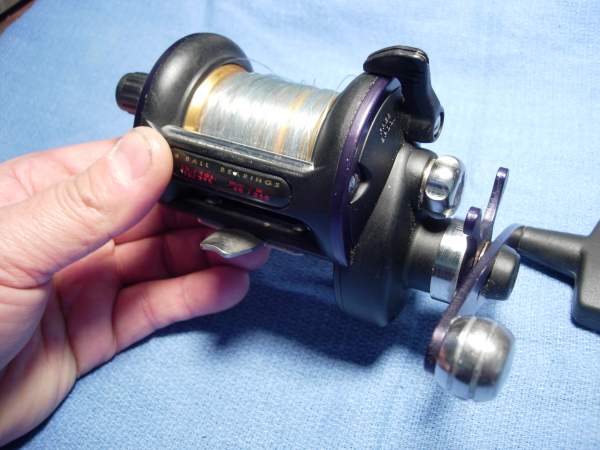
http://www.scottsbt.com/catalog/store/images/pennparts/schematics/525magt.pdfand here is our reel.
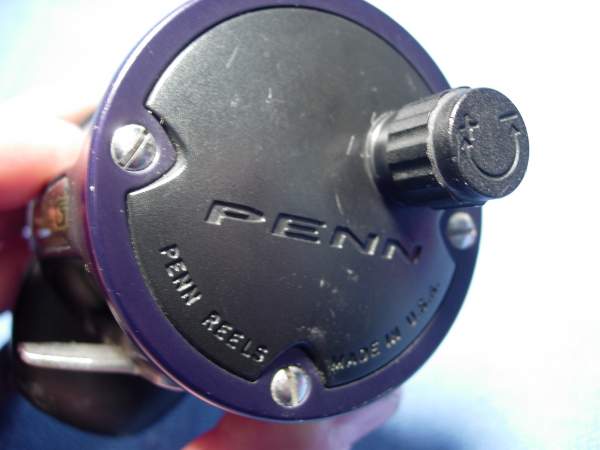
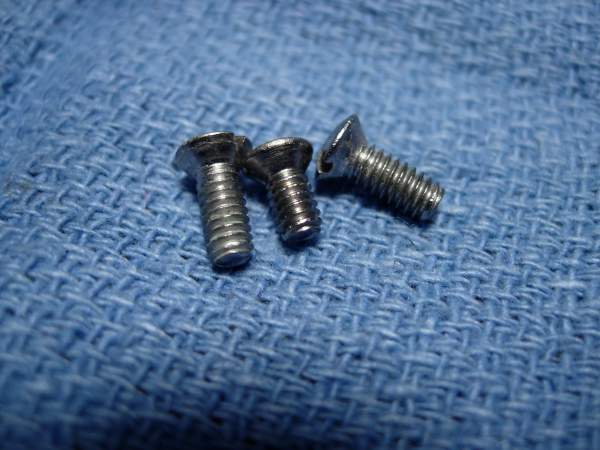
start by removing the left side plate screws (key #'s 32 and 110).
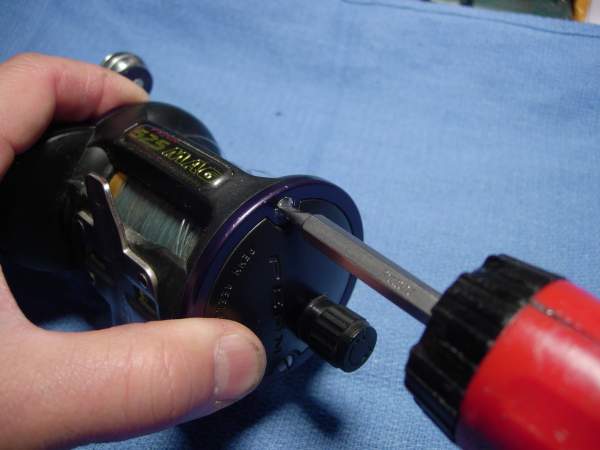
note that you have two long screws at the 3 and 9 o'clock positions (key #32) and one short screw at the 6 o'clock position (key #110).
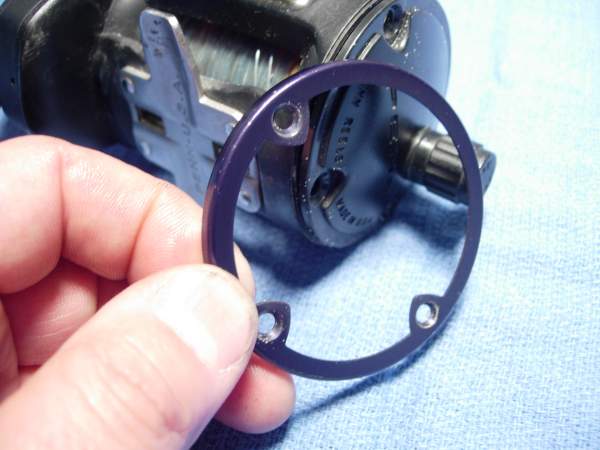
remove the left side ring (key #28).
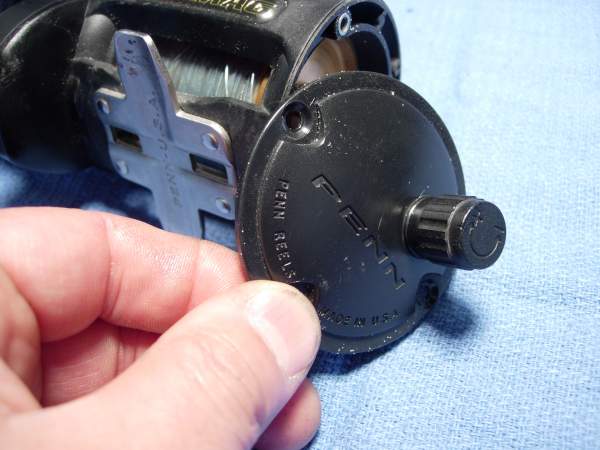
remove the left side plate (key #27).
here's an inside view of the left side plate, showing the magnet.
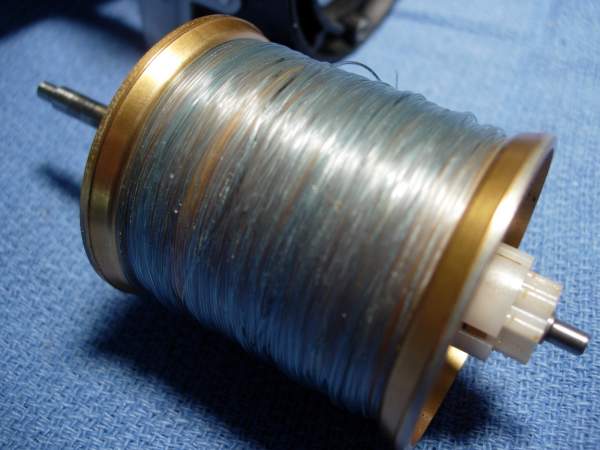
remove the spool assembly (key #29L).

[img]
http://alantani.com/gallery/2/1_10_02_10_3_16_06_4.jpeg[/img]
here's a quick glance inside the frame (key #183).
[img]
http://alantani.com/gallery/2/1_10_02_10_3_17_21_0.jpeg[/img]
[img]
http://alantani.com/gallery/2/1_10_02_10_3_17_26_1.jpeg[/img]
we're going to take a moment to clean up the frame a little.
[img]
http://alantani.com/gallery/2/1_10_02_10_3_17_30_2.jpeg[/img]
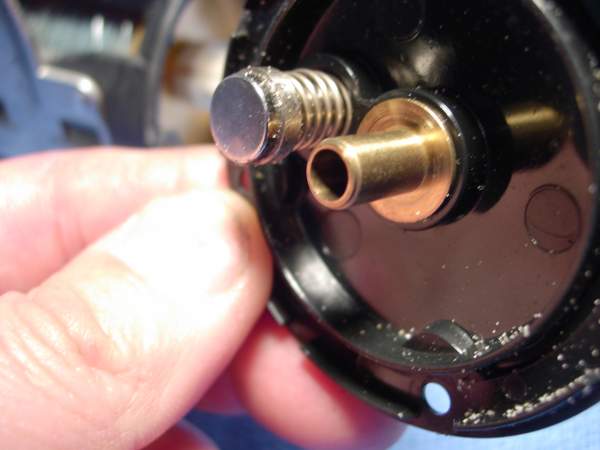
now, back to the spool. remove the spool spindle (key #71L).
[img]
http://alantani.com/gallery/2/1_10_02_10_3_17_33_3.jpeg[/img]
remove the clutch plate retainer (key #71C).
[img]
http://alantani.com/gallery/2/1_10_02_10_3_17_37_4.jpeg[/img]
[img]
http://alantani.com/gallery/2/1_10_02_10_3_19_17_0.jpeg[/img]
remove the clutch plate (key #71B).
[img]
http://alantani.com/gallery/2/1_10_02_10_3_19_58_1.jpeg[/img]
remove the right spool bearing (key #55). it measures 0.185 x 0.375 x 0.125 inches.
[img]
http://alantani.com/gallery/2/1_10_02_10_3_20_55_2.jpeg[/img]
remove the shields from this bearing, clean it with carb cleaner and compressed air, and lube it with xtreme reel +. for a full discussion of bearing maintenance, go to
http://alantani.com/index.php?topic=13.0. [img]
http://alantani.com/gallery/2/1_10_02_10_3_21_30_3.jpeg[/img]
i've seen some spools with alot of corrosion on the ends. clean up the spool an old toothbrush and leave a light coat of grease on it to prevent corrosion.
[img]
http://alantani.com/gallery/2/1_10_02_10_3_21_49_4.jpeg[/img]
install the right spool bearing (key #55).
[img]
http://alantani.com/gallery/2/1_10_02_10_3_28_50_0.jpeg[/img]
install the clutch plate (key #71B).
[img]
http://alantani.com/gallery/2/1_10_02_10_3_28_55_1.jpeg[/img]
install the clutch plate retainer (key #71C). you know, that retaining ring doesn't look like it's got a very good grip.
[img]
http://alantani.com/gallery/2/1_10_02_10_3_28_58_2.jpeg[/img]
let's flip the clutch plate over and reinstall the retainer.
[img]
http://alantani.com/gallery/2/1_10_02_10_3_29_00_3.jpeg[/img]
there, that looks like the ring has a better grip.
[img]
http://alantani.com/gallery/2/1_10_02_10_3_29_05_4.jpeg[/img]
use a flat screwdriver to CAREFULLY lift up the click ratchet (key #81). please do not break this. if you have two screwdrivers, place them at 180 dregrees, turn the blades clockwise and lift both sides simultaneously. i just can't do this and take a picture at the same time.
[img]
http://alantani.com/gallery/2/1_10_02_10_3_31_04_0.jpeg[/img]
[img]
http://alantani.com/gallery/2/1_10_02_10_3_31_07_1.jpeg[/img]
remove the left side spool bearing (key #55). this bearing also measures 0.185 x 0.375 x 0.125 inches.
[img]
http://alantani.com/gallery/2/1_10_02_10_3_31_11_2.jpeg[/img]
clean, lube and reinstall this bearing (key #55) in the same way.
[img]
http://alantani.com/gallery/2/1_10_02_10_3_31_14_3.jpeg[/img]
before you install the click ratchet (key #81), match up the grooves.
[img]
http://alantani.com/gallery/2/1_10_02_10_3_31_18_4.jpeg[/img]
[img]
http://alantani.com/gallery/2/1_10_02_10_3_32_54_0.jpeg[/img]
[img]
http://alantani.com/gallery/2/1_10_02_10_3_33_04_1.jpeg[/img]
install the spool spindle (key #71L).
[img]
http://alantani.com/gallery/2/1_10_02_10_3_33_07_2.jpeg[/img]
now give it a spin. using the stock abec 5 bearing, shields remove, clean and lubed with xtreme reel +, this bare spool spun for 2 minutes and 25 seconds. and that was without holding a beer in my left hand!
[img]
http://alantani.com/gallery/2/1_10_02_10_3_33_10_3.jpeg[/img]
install the spool assembly (key #29L).
[img]
http://alantani.com/gallery/2/1_10_02_10_3_33_14_4.jpeg[/img]
take a moment to grease the screw holes.
[img]
http://alantani.com/gallery/2/1_10_02_10_3_35_14_0.jpeg[/img]
install the left side plate (key #27).
[img]
http://alantani.com/gallery/2/1_10_02_10_3_35_21_1.jpeg[/img]
install the left side ring (key #28).
[img]
http://alantani.com/gallery/2/1_10_02_10_3_35_24_2.jpeg[/img]
install the two long left side plate screws (key #32) and the one short left side plate screw (key #110).
[img]
http://alantani.com/gallery/2/1_10_02_10_3_35_26_3.jpeg[/img]
now spin the spool. with the magnet backed all the way off, the spool spins for only 8 seconds. with the magnet cranked all the way in, freespool drops to 3 seconds.
[img]
http://alantani.com/gallery/2/1_10_02_10_3_35_29_4.jpeg[/img]
now for the right side plate. remove the handle lock screw (key #32A).
[img]
http://alantani.com/gallery/2/1_10_02_10_3_41_37_0.jpeg[/img]
remove the handle lock (key #110A).
[img]
http://alantani.com/gallery/2/1_10_02_10_3_41_40_1.jpeg[/img]
remove the handle nut (key #23) using a 7/16ths wrench.
[img]
http://alantani.com/gallery/2/1_10_02_10_3_41_42_2.jpeg[/img]
remove the handle (key #24).
[img]
http://alantani.com/gallery/2/1_10_02_10_3_41_46_3.jpeg[/img]
remove the tension spring washer (key #8). i usually throw these away. they tend to cause corrosion.
[img]
http://alantani.com/gallery/2/1_10_02_10_3_41_48_4.jpeg[/img]
remove the star drag (key #10).
[img]
http://alantani.com/gallery/2/1_10_02_10_3_43_26_0.jpeg[/img]
remove the tension spring washer (key #18).
[img]
http://alantani.com/gallery/2/1_10_02_10_3_43_28_1.jpeg[/img]
remove the two right side plate screws (key #32).
[img]
http://alantani.com/gallery/2/1_10_02_10_3_43_31_2.jpeg[/img]
push the eccentric lever (key #21) straight up.
[img]
http://alantani.com/gallery/2/1_10_02_10_3_43_33_3.jpeg[/img]
remove the right side ring (key #2).
[img]
http://alantani.com/gallery/2/1_10_02_10_3_43_37_4.jpeg[/img]
this is someone's idea of a joke. there is a small right side plate screw (key #39S) hidden underneath the right side ring (key #2).
[img]
http://alantani.com/gallery/2/1_10_02_10_3_44_52_0.jpeg[/img]
remove the right side plate screw (key #39S).
[img]
http://alantani.com/gallery/2/1_10_02_10_3_44_55_1.jpeg[/img]
remove the two lower right side plate screws (key #46).
[img]
http://alantani.com/gallery/2/1_10_02_10_3_45_00_2.jpeg[/img]
remove the right side plate assembly (key #1).
[img]
http://alantani.com/gallery/2/1_10_02_10_3_45_04_3.jpeg[/img]
[img]
http://alantani.com/gallery/2/1_10_02_10_3_45_06_4.jpeg[/img]
[img]
http://alantani.com/gallery/2/1_10_02_10_3_49_01_0.jpeg[/img]
take a moment to check out the gear stack. we've got a stainless steel pinion gear and a brass alloy main gear. it also has a stack of three drag washers that functions as a traditional stack of five.
[img]
http://alantani.com/gallery/2/1_10_02_10_3_49_04_1.jpeg[/img]
remove the clutch shaft (key #98S).
[img]
http://alantani.com/gallery/2/1_10_02_10_3_49_07_2.jpeg[/img]
remove the entire drag stack as a unit (key #'s 5, 6 and 7C).
[img]
http://alantani.com/gallery/2/1_10_02_10_3_49_10_3.jpeg[/img]
remove the fiber washer (key #4).
[img]
http://alantani.com/gallery/2/1_10_02_10_3_54_56_0.jpeg[/img]
remove the ratchet spacer (key #98R).
[img]
http://alantani.com/gallery/2/1_10_02_10_3_55_00_1.jpeg[/img]
remove the two clutch springs (key #18B).
[img]
http://alantani.com/gallery/2/1_10_02_10_3_55_06_2.jpeg[/img]
remove the pinion gear (key #13) and the pinion yoke (key #12) as a unit.
[img]
http://alantani.com/gallery/2/1_10_02_10_3_55_10_3.jpeg[/img]
remove the eccentric jack (key #11).
[img]
http://alantani.com/gallery/2/1_10_02_10_3_55_13_4.jpeg[/img]
remove the two bearing retainer screws (key #63).
[img]
http://alantani.com/gallery/2/1_10_02_10_3_58_54_0.jpeg[/img]
remove the gear stud (key #134) and bearing (key #20A) as a unit. this bearing measures 8 x 16 x 5mm.
[img]
http://alantani.com/gallery/2/1_10_02_10_3_59_02_2.jpeg[/img]
insert the top of the gear stud (key #134) into the hanlde (key #24) so that you have something to hold on to and remove the bearing screw (key #121).
[img]
http://alantani.com/gallery/2/1_10_02_10_3_59_06_3.jpeg[/img]
[img]
http://alantani.com/gallery/2/1_10_02_10_3_59_08_4.jpeg[/img]
[img]
http://alantani.com/gallery/2/1_10_02_10_4_02_26_0.jpeg[/img]
remove the shields of this bearing (key #20A), pack it with grease and replace the shields.
[img]
http://alantani.com/gallery/2/1_10_02_10_4_02_29_1.jpeg[/img]
reinstall the packed bearing (key #20A) and the bearing screw (key #121).
[img]
http://alantani.com/gallery/2/1_10_02_10_4_02_32_2.jpeg[/img]
well, now we have a problem. we need to pack the pinion bearing (no key #) with grease. to get to it, we will have to back track and remove the spool.
[img]
http://alantani.com/gallery/2/1_10_02_10_4_02_34_3.jpeg[/img]
with the spool removed, the pinion bearing (no key #) taps out easily. it measures 8 x 12 x 2.5mm. the bearing should be cleaned, packed with grease and reinstalled.
[img]
http://alantani.com/gallery/2/1_10_02_10_4_08_11_0.jpeg[/img]
ok, we are NOW ready to put everything back together.
[img]
http://alantani.com/gallery/2/1_10_02_10_4_08_14_1.jpeg[/img]
install the gear stud (key #134), bearing (key #20A) and screw (key #121) as a unit.
[img]
http://alantani.com/gallery/2/1_10_02_10_4_08_17_2.jpeg[/img]
install the bearing retainer (key #173).
[img]
http://alantani.com/gallery/2/1_10_02_10_4_08_19_3.jpeg[/img]
install the bearing retainer screws (key #63).
[img]
http://alantani.com/gallery/2/1_10_02_10_4_08_23_4.jpeg[/img]
install the eccentric jack (key #11).
[img]
http://alantani.com/gallery/2/1_10_02_10_4_09_44_0.jpeg[/img]
install the pinion gear (key #13) and pinion yoke (key #12) as a unit.
[img]
http://alantani.com/gallery/2/1_10_02_10_4_09_49_1.jpeg[/img]
install the clutch springs (key #18B).
[img]
http://alantani.com/gallery/2/1_10_02_10_4_09_51_2.jpeg[/img]
install the ratchet spacer (key #98R).
[img]
http://alantani.com/gallery/2/1_10_02_10_4_09_54_3.jpeg[/img]
we are going to replace the fiber washer (key #4) with a penn ht-100 #6-113 drag washer.
[img]
http://alantani.com/gallery/2/1_10_02_10_4_09_56_4.jpeg[/img]
slap a thick coat of cal's grease on the washer before installing it. don't worry about the excess grease. it will simply squeeze out the sides.
[img]
http://alantani.com/gallery/2/1_10_02_10_4_13_16_0.jpeg[/img]
install the main gear (key #5).
[img]
http://alantani.com/gallery/2/1_10_02_10_4_13_23_1.jpeg[/img]
slap a thick coat of cal's grease on the three drag washers (key #6).
[img]
http://alantani.com/gallery/2/1_10_02_10_4_13_28_2.jpeg[/img]
install the drag washers (key #6) alternating with the metal washers (key #7C) and the clutch shaft (key #98S).
[img]
http://alantani.com/gallery/2/1_10_02_10_4_13_32_3.jpeg[/img]
i almost forgot about the right side plate bearing (key #55A). this bearing measures 0.125 x 0.375 x 0.156 inches. this bearing can be difficult to open and pack, so we're going to just lube it with corrosion x and keep out fingers crossed that it does not corrode. lube the anti-reverse roller bearing with corrosion x as well.
[img]
http://alantani.com/gallery/2/1_10_02_10_4_13_35_4.jpeg[/img]
put a small bead of grease in the screw holes of the frame (key #183).
[img]
http://alantani.com/gallery/2/1_10_02_10_4_19_45_0.jpeg[/img]
flip the eccentric lever (key #21) forward and install the right main side plate (key #1).
[img]
http://alantani.com/gallery/2/1_10_02_10_4_19_48_1.jpeg[/img]
install the two lower right side plate screws (key #46).
[img]
http://alantani.com/gallery/2/1_10_02_10_4_19_51_2.jpeg[/img]
install the small right side plate screw (key #39S).
[img]
http://alantani.com/gallery/2/1_10_02_10_4_19_53_3.jpeg[/img]
move the eccentric lever (key #21) to the center and install the right side ring (key #2).
[img]
http://alantani.com/gallery/2/1_10_02_10_4_23_07_0.jpeg[/img]
install the two right side plate screws (key #32).
[img]
http://alantani.com/gallery/2/1_10_02_10_4_23_11_1.jpeg[/img]
install the tension spring (key #18).
[img]
http://alantani.com/gallery/2/1_10_02_10_4_23_14_2.jpeg[/img]
install the star drag (key #10) and turn it down until it clears the shoulders of the gear stud (key #134).
[img]
http://alantani.com/gallery/2/1_10_02_10_4_23_17_3.jpeg[/img]
remember the tension spring washer (key #8)? all it does is cause corrosion, so we are going to throw it away.
[img]
http://alantani.com/gallery/2/1_10_02_10_4_23_23_4.jpeg[/img]
install the handle (key #24).
[img]
http://alantani.com/gallery/2/1_10_02_10_4_31_20_0.jpeg[/img]
install the handle nut (key #23).
[img]
http://alantani.com/gallery/2/1_10_02_10_4_31_27_1.jpeg[/img]
install the handle nut lock cap (key #110A).
[img]
http://alantani.com/gallery/2/1_10_02_10_4_31_31_2.jpeg[/img]
install the handle lock screw (key #32A).
[img]
http://alantani.com/gallery/2/1_10_02_10_4_31_41_3.jpeg[/img]
install the spool assembly (key #29L).
[img]
http://alantani.com/gallery/2/1_10_02_10_4_31_51_4.jpeg[/img]
install the left side plate (key #27) and left side ring (key #28).
[img]
http://alantani.com/gallery/2/1_10_02_10_4_42_49_0.jpeg[/img]
install the left side plate screws (key #'s 32 and 110).
[img]
http://alantani.com/gallery/2/1_10_02_10_4_42_51_1.jpeg[/img]
congratulations, you're done!
[img]
http://alantani.com/gallery/2/1_10_02_10_4_42_54_2.jpeg[/img]
well, almost. no rebuild would be complete without the signature handle upgrade. here's the same reel with a chromed arm and a 4/0 kolekar grip.
[img]
http://alantani.com/gallery/2/1_10_02_10_4_43_02_4.jpeg[/img]
[img]
http://alantani.com/gallery/2/1_10_02_10_4_43_41_1.jpeg[/img]
ok, now we're done!